
Start with safety first, then measure your existing door. Remove its hinges, use tools such as door jigs, and align it perfectly. Once prepared, install the new door smoothly. Explore this guide for a detailed process.
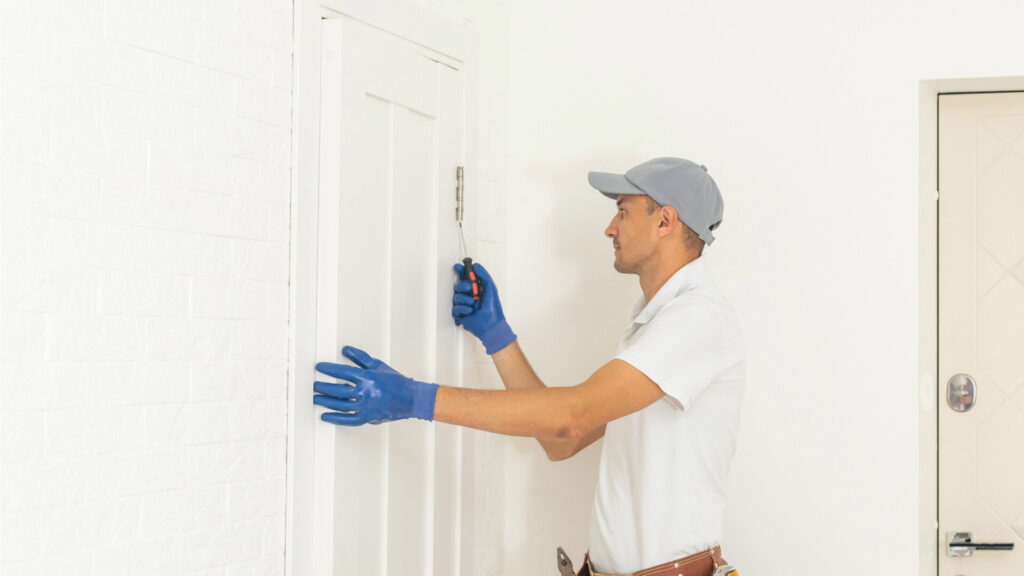
Table of contents
Safety Precautions
When replacing interior doors in New Jersey, safety should always come first. Before beginning, always gather the necessary protective gear, such as gloves to prevent any injuries from splinters and sharp tools
It’s also wise to employ the buddy system, having a friend or family member assist, especially when lifting and aligning the door; two sets of hands can ensure better stability and reduce the risk of accidents.
If you’re unsure about any step or feel uncomfortable tackling the project on your own, consider hiring a Door Replacement and Installation Professional in New Jersey. They’ll not only bring expertise to the task but also ensure the job is done correctly and safely, saving you both time and potential hassles.
Preparation
Doors are large and sometimes heavy. Ensuring you have enough space to move the door around without bumping into other objects is crucial. Move objects and items away from the door to make sure you have space to work. Additionally, secure any pets or family members who may wander out the open door. Strap grandma into her rocker because we’re going to learn how to replace a door.
Measure your Old Door
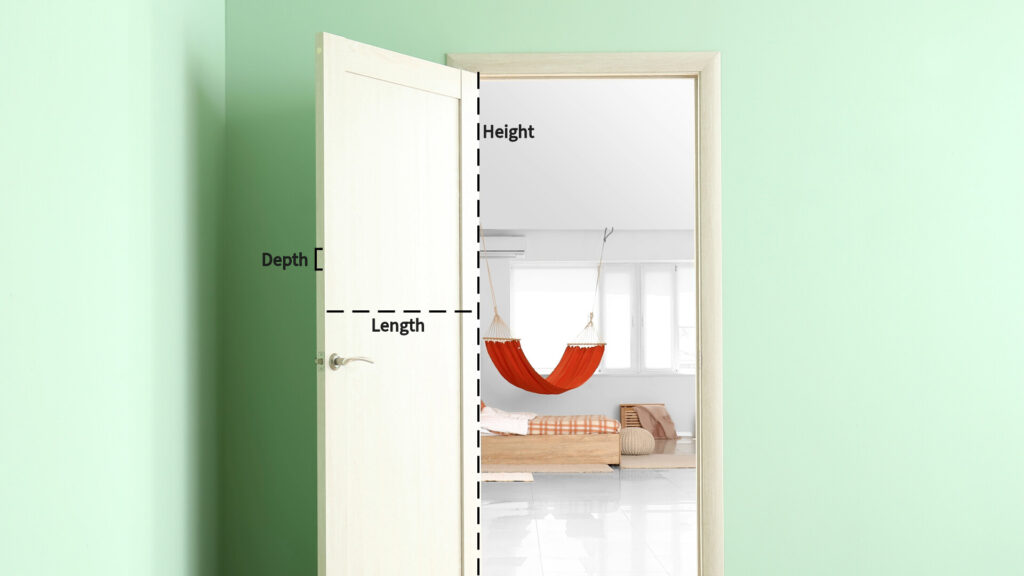
Measuring your old door before replacing it is essential to ensure a proper fit. Correct measurements avoid extra costs and time-consuming adjustments.
- Measure the Height: Position your tape measure at the top corner of the door and extend it down to the bottom corner. Ensure you’re only measuring the door, excluding any additional elements like a door sweep.
- Measure the Width: Start from the left corner of the door and run your tape measure across to the right corner. Again, remember to focus solely on the door, avoiding elements such as weather-stripping.
- Determine the Depth: Place the tape measure on the door’s edge to gauge its thickness.
Once you have these measurements accurately noted, you’re ready to buy a new door that fits your specifications. Madison Door offers top-quality doors that are perfect for your home.
Tools and Materials Needed
When replacing interior doors in New Jersey, specific tools and materials are crucial for a seamless procedure. Below are the necessary tools and materials:
- Replacement Door (Yep)
- Tape measure
- Slim-tipped screwdriver
- Flat chisel
- Hammer
- Sawhorses
- Ruler
- Utility Knife
- Piece of wood (for aiding in hinge installation)
- Door Lock Installation Jig
- Drill
- Chisel (for the latch plate mortise)
- Self-centering Hinge Bit
- Screws
Remove Your Old Door
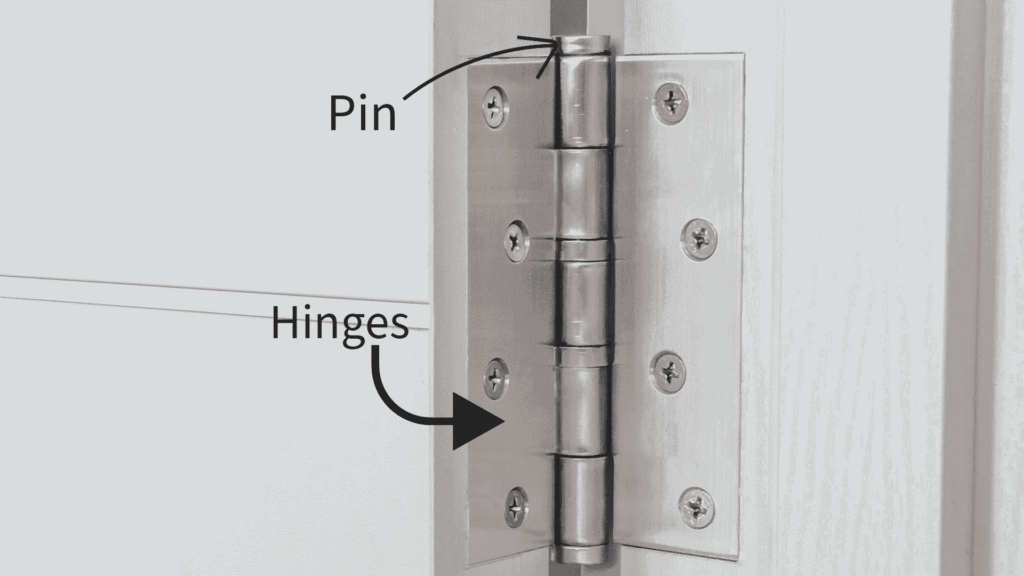
When removing an old interior door, start by focusing on the hinges. If they’re attached with a hinge pin, begin from the bottom hinge and move upwards. Close the door and use a slim-tipped screwdriver or a flat chisel to slide beneath the pin head, allowing you to tap it upwards gently with a hammer.
However, if your door is equipped with hinges that don’t have removable pins, they’ll need to be unscrewed directly from the frame. To do this, first open the door to expose the hinge leaves. Partially loosen all the screws in the initial hinge to evenly distribute the door’s weight. Once that’s done, completely unscrew and remove each screw sequentially.
Protip: Place a wedge under the door so as you remove the door pressure doesn’t build on one hinge making it hard to remove.
Use Your Old Door as a Guide to Mark Hinges On The New Door
Put your new door on the sawhorses. Then, put your old door on top of the new one to see where the hinges should go on the new door. Use a ruler to mark where the top and bottom of each hinge are on the new door. On the old door, check how far each hinge is from the door’s edge. Do the same for the new door. Draw around each hinge on the new door inside your marks.
Protip: Use a piece of cardboard between the doors to avoid any rub marks.
Now, stand the new door on its side. Use a utility knife to mark the spots for each hinge. Go slowly around any round marks to make it easy to cut out those parts. Carefully cut out the spots for each hinge. Keep using the knife to mark the spots as you cut deeper. Finally, use a piece of wood to help you gently hit the hinges with a hammer into their spots.
Use a Door Lock Installation Jig
Use a door lock installation jig to make holes for the latch and handle. You can buy this at your local hardware store. Check the old door to see where the latch is placed. Using that as a guide, place your tool on the new door at the same spot. Then, drill holes where the latch and handle will go.
This tool also comes with a special piece to help carve out a space for the latch plate. Once you’ve used the tool, you’ll see an outline on the door. Take a chisel and carefully remove the extra wood inside this outline. Once you’ve made the space, attach the latch and handle.
For the door hinges, mark the middle of each spot where the screws will go. Attach the hinges using screws. Use a self-centering hinge bit to ensure the screws go in the center.
For additional guidance, check out this easy-to-follow YouTube tutorial

Install Your New Interior Door
Once you’ve done all the prep work, you’re ready to put in your new door. Here’s how you can do it easily:
- Lift the Door: With the help of a friend or using your strength, carefully lift the new door. It might be a bit heavy, so be prepared.
- Line Up the Hinges: Now, look at the door frame and find where the hinges go. Slowly align the hinges of your door with those spots on the frame. It’s important to get this right so the door fits well and opens and closes smoothly.
- Screw in the Hinges: Once everything is lined up, start putting screws into the hinges. This will attach your door to the frame. Make sure all screws are tight, so the door is secure.
Tip to consider:
If you’ve tightened the screws on your hardware too much, don’t worry—a toothpick can help. Take off the hardware and push a wooden toothpick into the screw hole. Snap off any part of the toothpick that sticks out, leaving the rest inside the hole. Then, reattach your hardware and tighten the screw, making sure not to apply too much force this time.
Conclusion
Installing interior doors in New Jersey is a process that requires meticulous attention to detail, from measuring your old door to ensuring the new one is insulated and weatherproofed. With this comprehensive guide, you’re equipped with all the knowledge you need to tackle this project with confidence. Remember, while DIY can be fulfilling, there’s no harm in seeking professional assistance if you’re unsure about any step. In the end, the primary goal is to have a door that not only looks good but also functions optimally, ensuring the comfort and safety of your home.
Fact checked by Jacob Petrosky – 10/16/23