
Obtain required permits and comply with New Jersey’s building codes. Remove old siding and apply a weather-resistant barrier. Secure a starter strip at the base, add corner posts, then affix your siding panels in place. This is just the beginning steps.
Table of contents
What is Vinyl Siding?
So, you’re thinking of sprucing up your home’s exterior, and vinyl siding keeps coming up in your research. But what exactly is this material, and why has it become such a popular choice in New Jersey and beyond?
Vinyl siding is a durable exterior cladding that is designed to protect your home while offering aesthetic appeal. Composed mainly of polyvinyl chloride, or PVC, this material has become increasingly popular as an alternative to traditional wood or metal siding.
Why Install Vinyl Siding?
As you consider giving your home a facelift, one question invariably looms: why opt for vinyl siding? It’s a fair question. In a landscape teeming with myriad materials, why should vinyl emerge as your go-to choice? The answer resides in a compelling blend of durability, cost-effectiveness, and aesthetics.
Durability
Vinyl siding is engineered for longevity and resilience. Its chemical composition makes it resistant to many of the issues that plague other materials. Unlike wood, it won’t rot or warp. Unlike metal, it won’t rust. These features make it particularly appealing in New Jersey, where homes are exposed to a variety of weather conditions, from blazing summers to icy winters.
Low Maintenance
Unlike wood or other types of siding that require frequent painting, staining, or sealing, vinyl siding needs minimal maintenance. A simple wash with water and mild soap usually suffices to keep it looking new. You won’t have to worry about termite damage, rotting, or corrosion, saving you both time and money in the long run.
Cost-Effectiveness
Vinyl siding is generally less expensive than other materials like wood, stone, or brick, both in terms of the initial cost of the materials and the cost of installation. This makes it an attractive option for homeowners on a budget.
Understanding New Jersey’s Building Codes and Regulations Related to Siding
So, you’ve decided to upgrade your home’s exterior with vinyl siding. But before you dive into the installation process, it’s essential to grasp New Jersey’s specific building codes and regulations that pertain to this popular home improvement choice. These codes ensure the safety, durability, and quality of your project. Here’s what you need to know:
Certification Matters
First things first: ensure your vinyl siding is certified and labeled as meeting the ASTM D3679 standards. This certification is issued by approved quality control agencies and serves as your assurance that you’re installing a product that adheres to rigorous safety and quality specifications.
Geographic and Structural Considerations
Believe it or not, wind speed and building height also come into play. Vinyl siding is often permitted on buildings where wind speeds do not exceed 100 mph and the structure is no taller than 40 feet. If your property falls outside these parameters, you might need to submit additional tests or calculations for approval.
Installation Guidelines
Pay close attention to the nitty-gritty of installation, particularly the fasteners. These need to have a minimum 0.313-inch head diameter and an 1/8-inch shank diameter. Moreover, they should be corrosion-resistant and penetrate at least 3/4 inch into the studs or nailing strip. Spacing rules also apply; when installing horizontally, fasteners should not be more than 16 inches apart horizontally and 12 inches vertically. The same vertical limit applies for vertical installations, but horizontally, the spacing should not exceed 12 inches.
Homeowners Association (HOA) Regulations

In New Jersey, just like in other states, it’s essential to consult your specific HOA’s governing documents before beginning any home improvement projects like installing vinyl siding. Here are common HOA guidelines on vinyl siding:
- Color and Style: Some HOAs have strict rules about the color schemes and styles of siding you can use, aiming to maintain a cohesive look throughout the community.
- Quality of Material: Your HOA might require that you use a particular grade or quality of siding material, often to ensure durability and a uniform appearance.
- Approval Process: Before starting any work, you might need to submit plans, samples, or even color swatches for approval by the HOA board or architectural committee.
- Contractors: Some HOAs require you to use pre-approved contractors for any external building work, including siding installation.
- Timeline: Once approved, your HOA might specify a timeline within which the project must be completed to minimize disruption to the community.
- Inspections: Post-installation inspections by the HOA might be required to ensure compliance with community guidelines.
It’s vital to read your HOA’s covenants, conditions, and restrictions (CC&Rs) or consult with HOA representatives to understand these rules fully. Failure to adhere to your HOA’s guidelines can result in fines, forced removal of the non-compliant siding, or even legal action.
So, before you start on your vinyl siding project, make sure you’re not just compliant with New Jersey’s building codes but also with your local HOA’s rules and regulations.
Vinyl Siding Installation Process
Elevating the curb appeal of your home with vinyl siding isn’t just a design decision; it’s a project that requires careful planning and execution. Here’s a guide to help you understand what goes into a successful vinyl siding installation.
Planning and Preparation

The first step in your siding adventure involves a few preliminary activities. Start by calculating the square footage of your home’s exterior to determine the amount of siding you’ll need. Also, don’t forget to secure any necessary permits. Abiding by local building codes and HOA rules can save you from a headache later on. Last but not least, gather all the tools and materials—such as siding panels, J-channels, utility trim, nails, and a level—so you’re not scrambling for them later.
Common Tools and Materials for Vinyl Siding Installation
- Vinyl Siding Panels: These are the main components that cover the exterior of a structure. They come in various styles and colors to suit the desired aesthetic.
- J-Channel: Used around windows and doors, J-channels provide a finished look and help direct water away from openings.
- Nail Slot Punch: Used to extend nail slots in vinyl without cracking or breaking.
- Tin Snips: Handy for cutting and shaping the siding, especially for making more intricate cuts.
- Level: Ensures that the siding panels are installed horizontally straight.
- Starter Strip: This is a foundational strip that is nailed to the bottom of the exterior wall, onto which the first row of siding panels is attached.
- Corner Posts: These frame the corners of the structure, providing a clean and polished finish.
- Utility Trim or Finish Trim: This trim secures the top edge of the last siding panel below the eaves or windows.
- Weather-Resistant Barrier (like house wrap): A material applied over the sheathing to prevent moisture infiltration. It acts as a secondary barrier in case water gets behind the siding.
- Soffits and Fascia: While not directly part of the siding, soffits cover the underside of roof overhangs, and fascia covers the edge of the roof. They complement the look of the vinyl siding.
Remember, it’s essential to familiarize yourself with these tools and materials and to use them correctly to ensure a safe and effective vinyl siding installation.
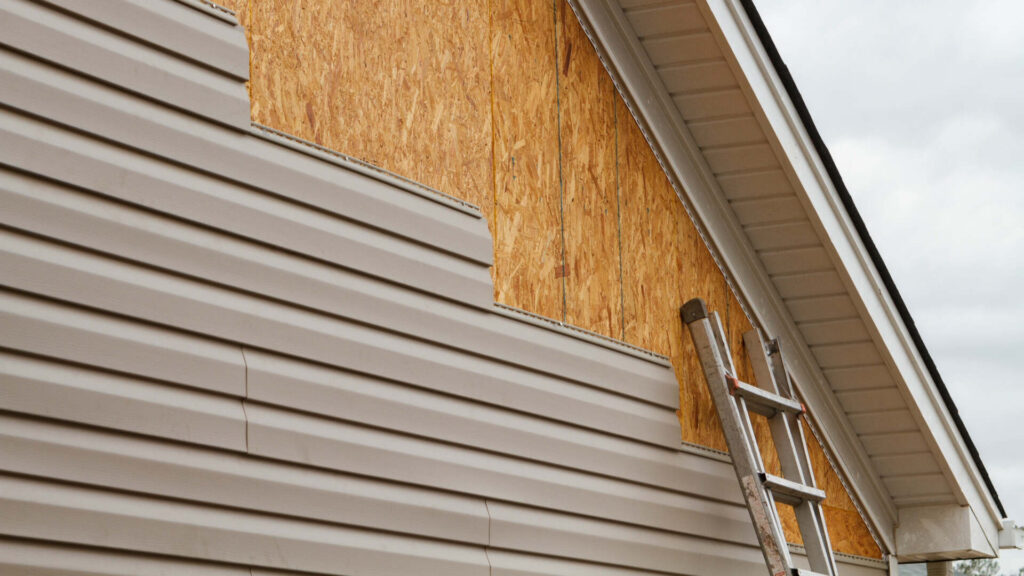
Site Preparation
Before installing the new siding, you may need to remove any existing siding from your home. Do this carefully to avoid damaging the underlying structure. Once that’s done, inspect the wall surface and repair any flaws or irregularities. This ensures a smooth and stable foundation for your new siding. For added moisture protection, consider installing a weather-resistant barrier like house wrap over the sheathing.
Starter Strip Installation
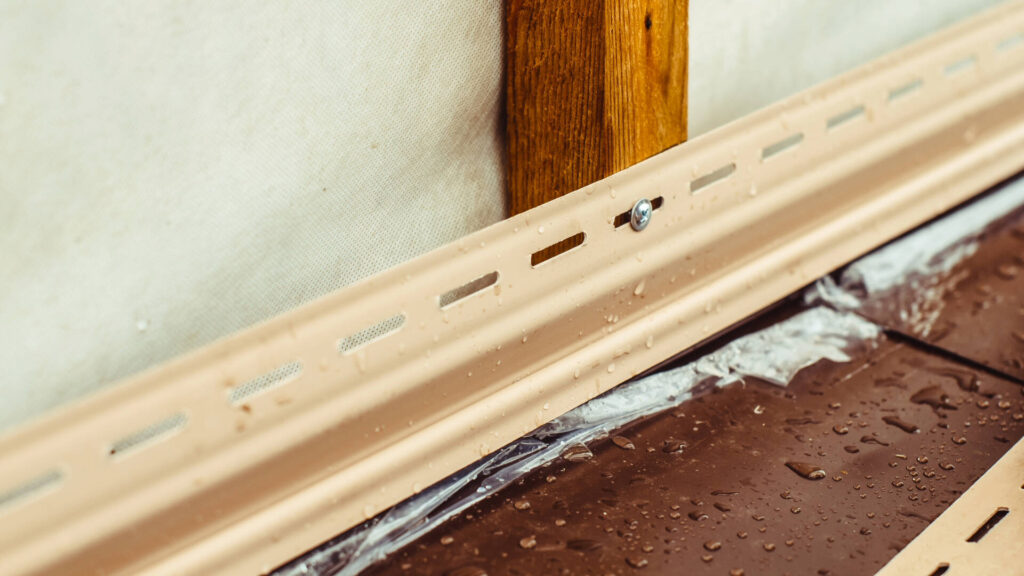
The starter strip acts as a base for your vinyl siding, so it’s crucial to get this part right. Using a level, make sure the starter strip is perfectly straight before nailing it into place at the bottom of your exterior wall.
Corner Posts and J-Channels
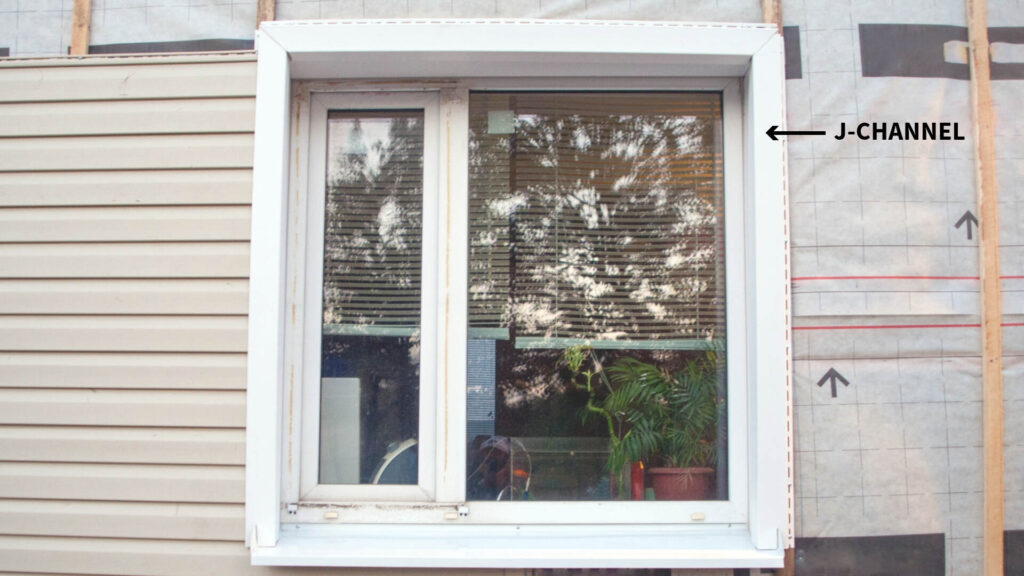
Now comes the task of installing the corner posts and J-channels. The corner posts should be plumb and leave a little room for expansion at the top. J-channels are installed around windows and doors and serve the important function of guiding water away from these vulnerable areas.
Install the Siding Panels
Once the foundational pieces are in place, you can start attaching the siding panels. Hook the first panel into the starter strip, ensuring its level before securing it. Then, proceed to install additional panels, remembering to overlap the edges by approximately one inch to create a weather-resistant seal. You’ll also need to cut panels to fit around windows, doors, and corners, so be prepared to customize as you go along.
Utility Trim and Finish
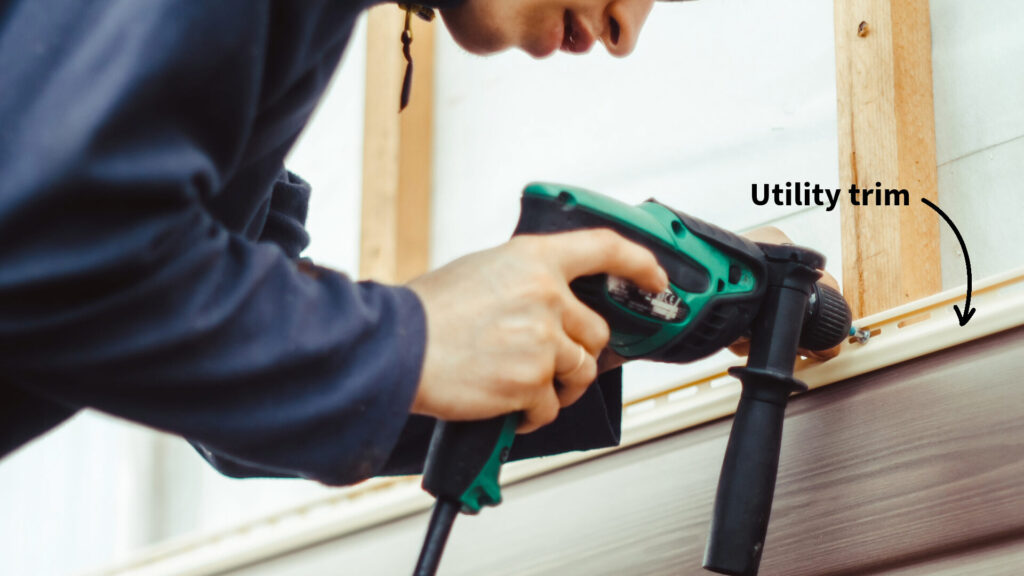
As you approach the top of the wall, you may need to trim the siding panels lengthwise. These cut pieces can be secured using utility trim. Once all the panels are in place, focus on the finishing touches. This includes installing soffits, fascia, and any other trim pieces that will give your project a polished appearance.
Inspection and Cleanup
Finally, don’t underestimate the importance of a thorough inspection and cleanup. Walk around your home to examine the installation for any loose panels or other imperfections. Make any necessary adjustments, and then clean up the work area, removing all debris, tools, and leftover materials.
Safety Precautions to Consider
When it comes to installing vinyl siding, safety should be your top priority. After all, no home improvement project is worth jeopardizing your well-being. Below are some essential safety precautions to keep in mind:
- Wear Appropriate PPE (Personal Protective Equipment): Don’t skimp on safety gear. Wear gloves to protect your hands, safety goggles to shield your eyes, and ear protection if you’re using loud power tools.
- Read Manufacturer’s Instructions: Always read and follow the manufacturer’s guidelines for the vinyl siding and tools you’re using. This will help you understand any specific safety measures you need to take.
- Maintain Tool Safety: Keep your tools in optimal condition. Dull blades or malfunctioning equipment can lead to accidents. Make sure to unplug any electrical tools when not in use.
- Ventilation: If you’re cutting siding indoors or in a poorly ventilated area, ensure adequate air circulation to disperse harmful fumes or dust.
- Community Rules: Lastly, always double-check your local New Jersey building codes and homeowners association regulations to ensure you’re complying with all safety standards and guidelines.
Conclusion
In the journey to enhance your New Jersey home with vinyl siding, preparation and knowledge are your best allies. From understanding the materials and their benefits to complying with state and local building codes, each step carries its own significance. But remember, even with the best plans, neglecting safety can have serious consequences. Always prioritize safety precautions like wearing proper PPE, securing ladders, and following manufacturer’s guidelines to ensure a smooth and accident-free installation process.
While DIY projects can be rewarding, there are instances where professional guidance is invaluable. If you encounter difficulties, or if your project involves complexities beyond your expertise, don’t hesitate to seek the advice of a professional. A certified contractor can ensure that your vinyl siding is installed according to New Jersey’s building codes, homeowners association rules, and safety standards. They bring a level of skill and experience that can save you time, money, and potential setbacks.
Fact checked by Jacob Petrosky – 8/31/23